Creating KEDA Scalar in Azure Container Apps using Azure Portal
Nov 22, 2023 | Utkarsh Shigihalli
| 3 min read
devops
Utkarsh Shigihalli
| 3 min read
devops
In this post, I would like to show you how we added custom scaling with KEDA using the Azure Portal — Thanks to the KEDA scaler, we have a dynamic scaling pool, which automatically scales when there are more jobs in the queue and scales back down when demand reduces.
We run our Azure DevOps Build agents inside a container. This has allowed us to package various tools like kubectl, helm, and terraform are installed and available inside the agent image, which gives us control over versions of the tools we use — as we can execute our continuous integrations with consistent configuration. Also, adding any new tool is just adding installation instructions to the Dockerfile and publishing a new image.
Microsoft has detailed documentation on running Azure DevOps agent inside a container here
Further, we are running our agents as an Azure Container App, which has freed us from maintaining a dedicated AKS cluster and lets us dynamically scale the agents — a new agent per pipeline job with the help of custom scaling rules and KEDA.
Creating an Azure Container App
Creating an Azure Container App can be done in a variety of ways — Terraform or any other IaC code, Azure CLI, or through Portal. We are using Terraform internally, but for the sake of this post, I am showing creating using the portal.
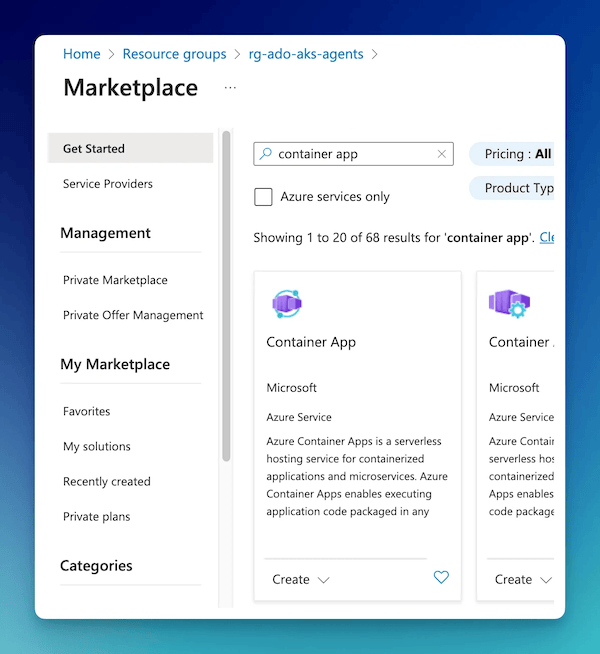
So, search for the service and select Container App.
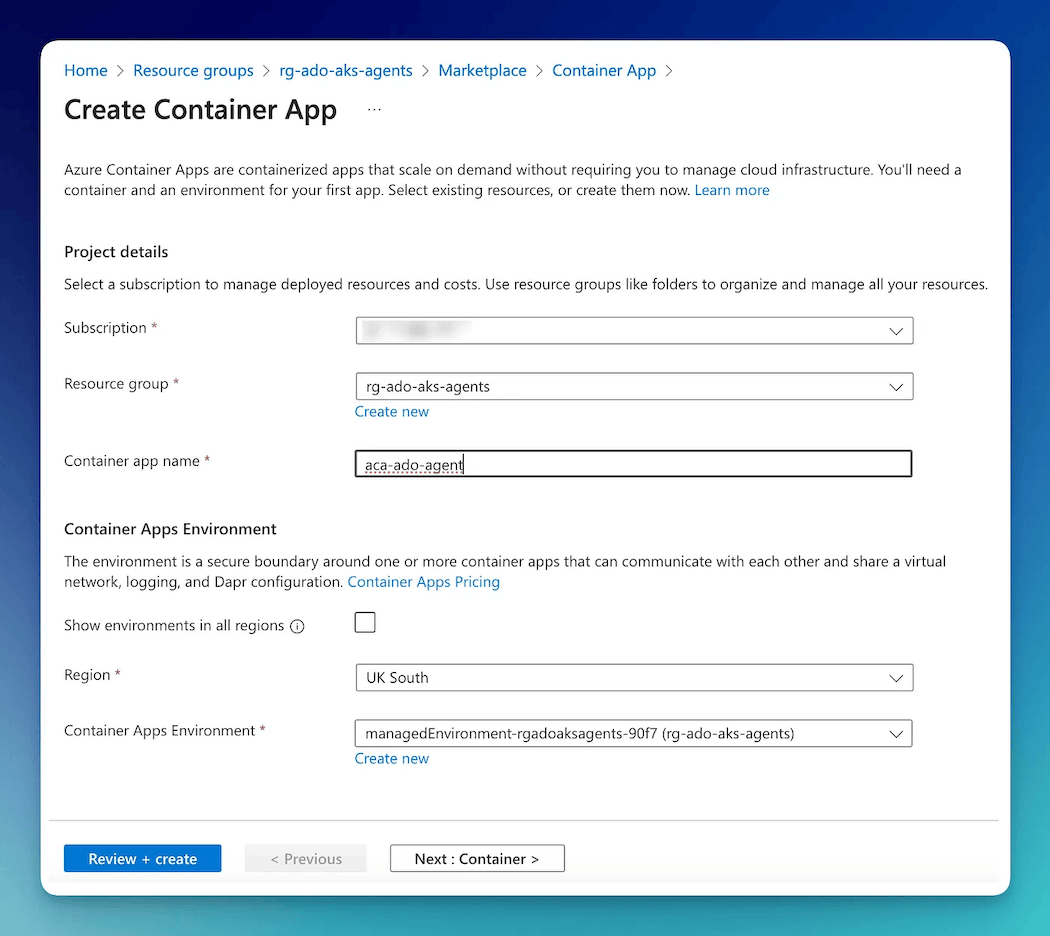
The first step is the provide the name and select a region and Container Apps environment. I have decided to use the existing environment below.
The next tab in the wizard is about the container. Our team-specific image is in our internal Azure Container Registry and the wizard fills the drop-downs for easy selection.
The only change I have made here is, changing the CPU and Memory values as needed for the image — Notice I am using Consumption Plan as we know this team does not need high-performance agents.
As conveyed previously, this feature of allocating individual CPU and Memory configurations has great benefits over AKS. For example, we have a separate container app with a dedicated workload profile for running CPU and Memory-intensive jobs.
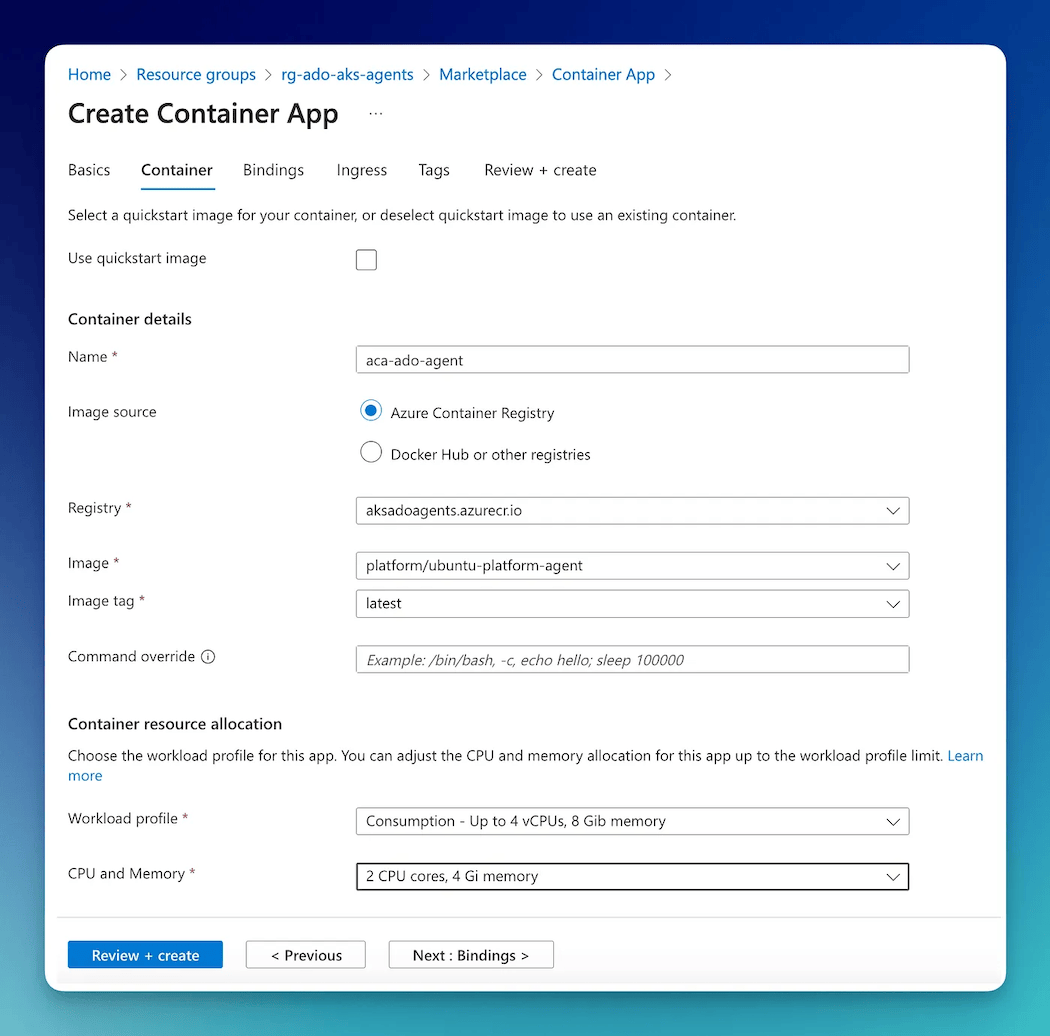
The rest of the wizard is left at defaults as I do not have any bindings or Ingress to configure.
This should get your container app running.
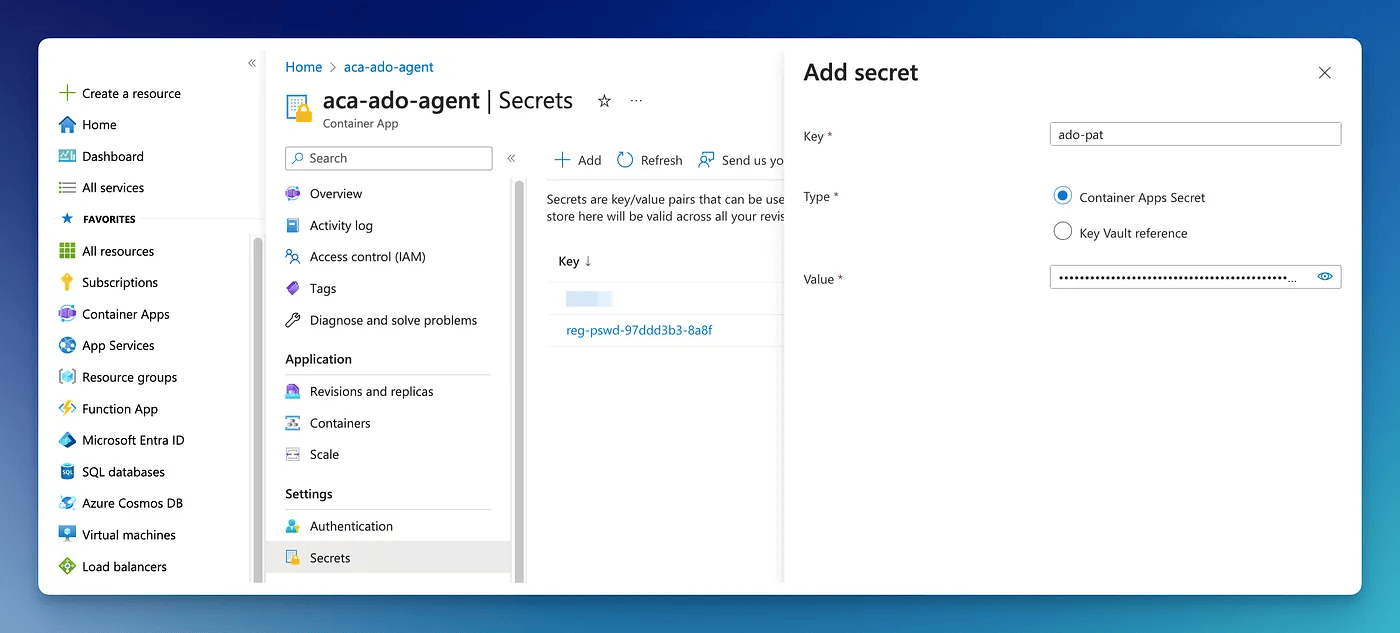
Create a secret to store Azure DevOps PAT
The first step in the container app is to Add a secret and store our Azure DevOps PAT (Personal Access Token). PAT is needed for the Azure DevOps build agent to connect to our Azure DevOps service. Later in the post, we use this PAT to let KEDA authenticate to our Azure DevOps service to monitor the Agent Pool for new jobs.
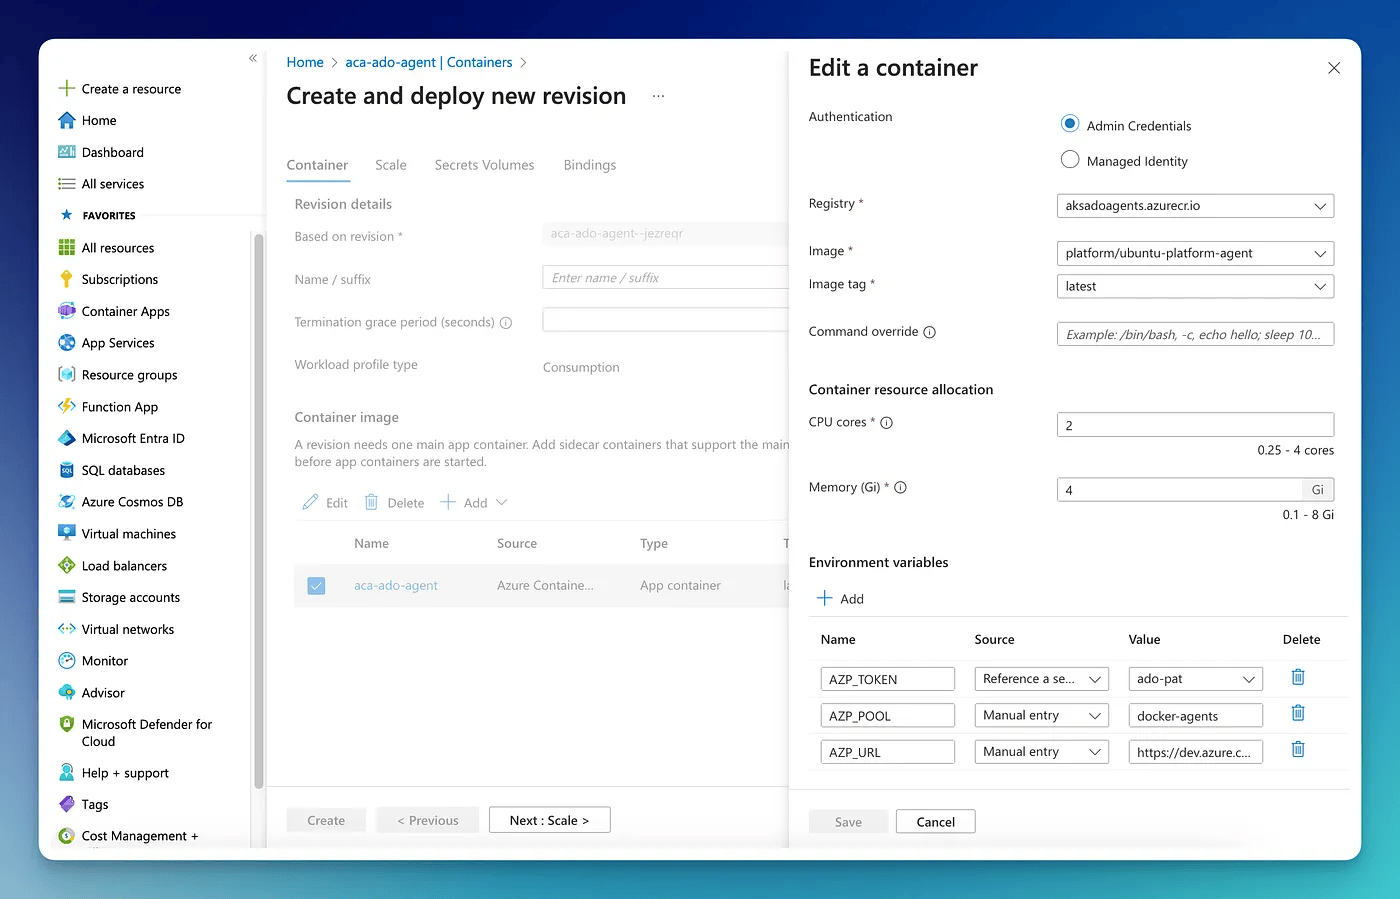
Create a new revision
The next step is to edit the container and define the few environment variables that are required for the container (for more on these specific environment variables refer to this documentation).
Notice, for AZP_TOKEN the source is set as Reference a secret as I want value for that to come from the secret defined in the previous step.
Create a custom Scale rule
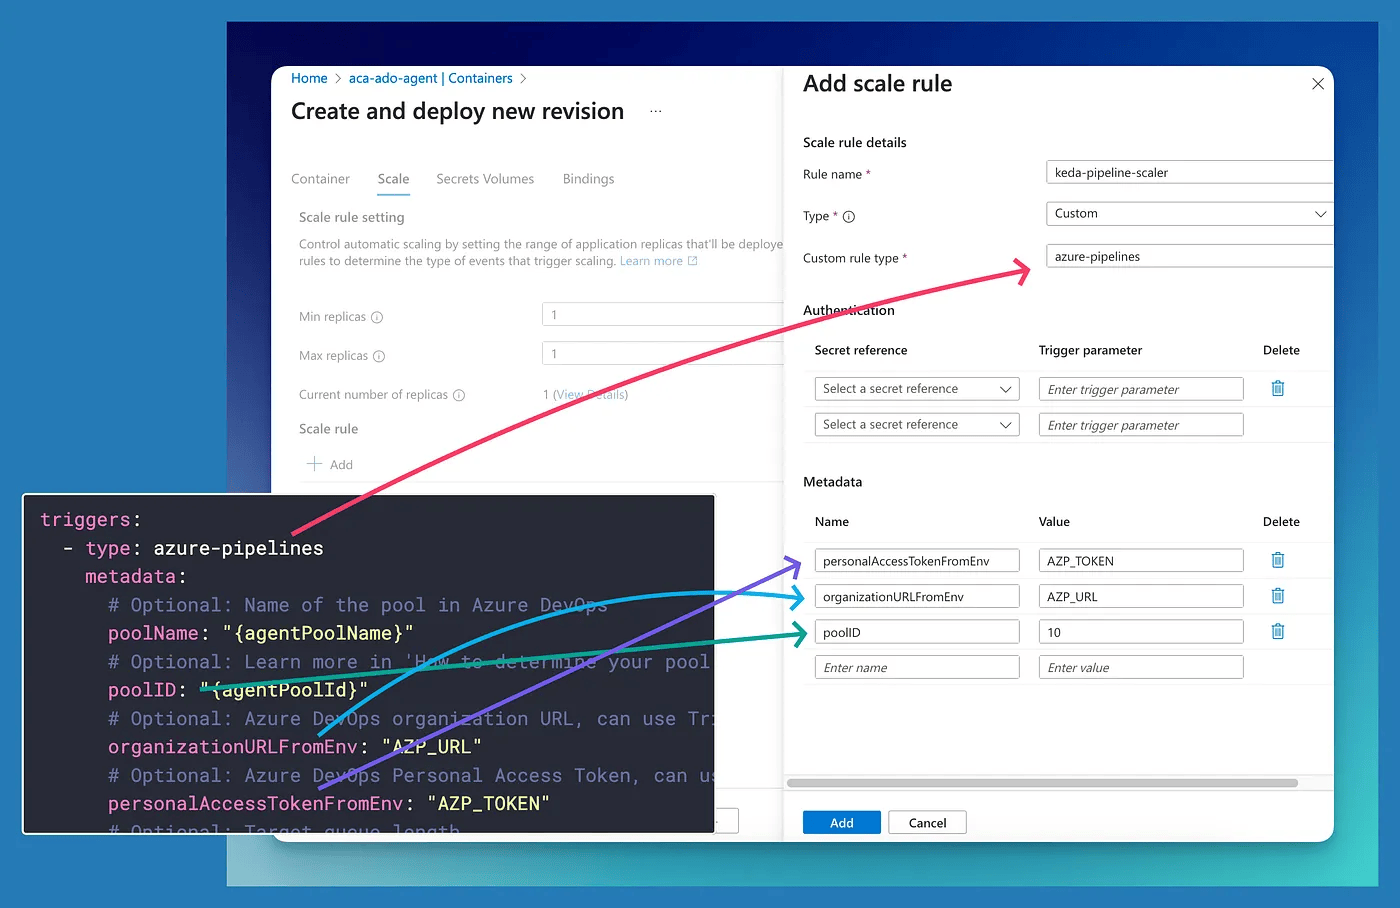
The next and final step is to define the custom scale rule — which in our case is KEDA.
So in the Scale tab, click +Add and then enter the details below
Rule name:This is the name for the custom scale rule, can be anything.Type: CustomCustom rule type: This is defined with the Scaler definition. I am using Azure Pipelines scaler, so this should matchtypefield of the Scaler definition.
Next, we need to add a few metadata values so that KEDA knows which agent pool should it monitor for new jobs. These will come from metadata keys of the scaler definition.
peronalAccessTokenFromEnv: This lets KEDA authenticate with our Azure DevOps service to monitor the Agent Pool. The value is PAT we defined in the secret previously — which has been passed to the container as an environment variable, so we use that environment variable.organizationURLFromEnv: This is our Azure DevOps organization URL, again we set this as an environment variable in the previous section.poolID: This is the Azure DevOps pool ID which KEDA should monitor. Refer to the scaler docs on how to get this.
That is it for the post. Hope you found it useful.
Conclusion
In this post, I showed how we added custom scaling with KEDA using the Azure Portal. Thanks to the KEDA scaler, we have a dynamic scaling pool, which automatically scales when there are more jobs in the queue and scales back down when demand reduces.