How to publish Helm 3 charts to GitHub Container Registry using GitHub Actions
Apr 10, 2021 | Utkarsh Shigihalli
| 2 min read
github
helm
packages
container
registry
Utkarsh Shigihalli
| 2 min read
github
helm
packages
container
registry
I have already written how to publish Helm chart to ACR using Azure DevOps and GitHub actions. But did you know that you can also publish Helm3 charts (or any OCI compliant package) to GitHub Container Registry(GCR)? In this post we will see how to do that.
Enable improved container support
GitHub Container Registry is currently in public beta. So, the first step is to ensure that you have enabled the GitHub Container Registry for your account. If you have GitHub personal account, you can do that from Feature Preview window.
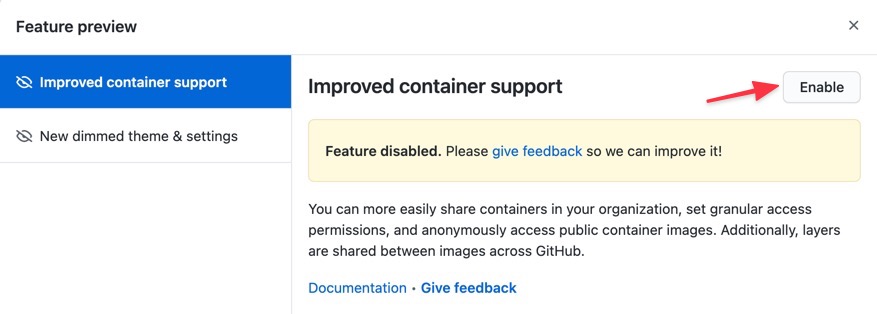
If you have a Enterprise account, you can do that going to Settings page.
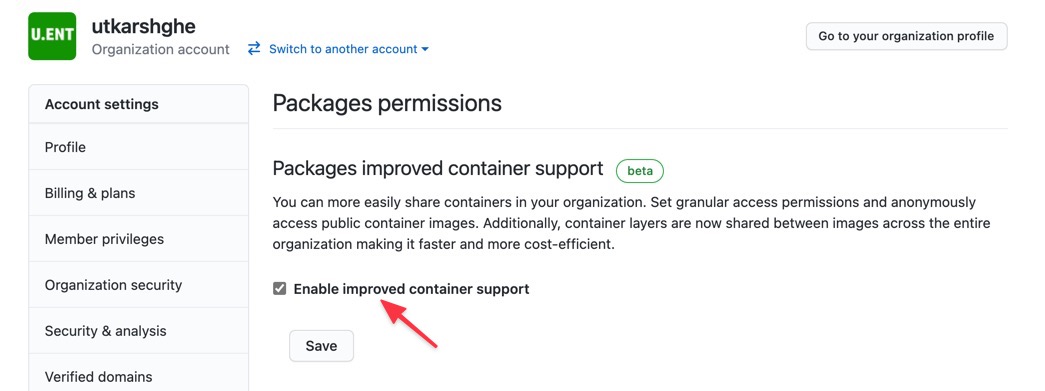
GitHub documentation has step-by-step guide of enabling improved container support here
Publishing Helm 3 charts using GitHub Actions
It really takes only couple of steps to publish a Helm chart to GCR using GitHub Actions. Like any other action, you start by creating .github\workflow folder and create an yml file in your repository.
Excluding the name and trigger part, first step in the YAML is to define few necessary variables.
env:
HELM_EXPERIMENTAL_OCI: 1 #enable OCI support
HELM_VERSION_TO_INSTALL: 3.5.0 # version of HEL to install
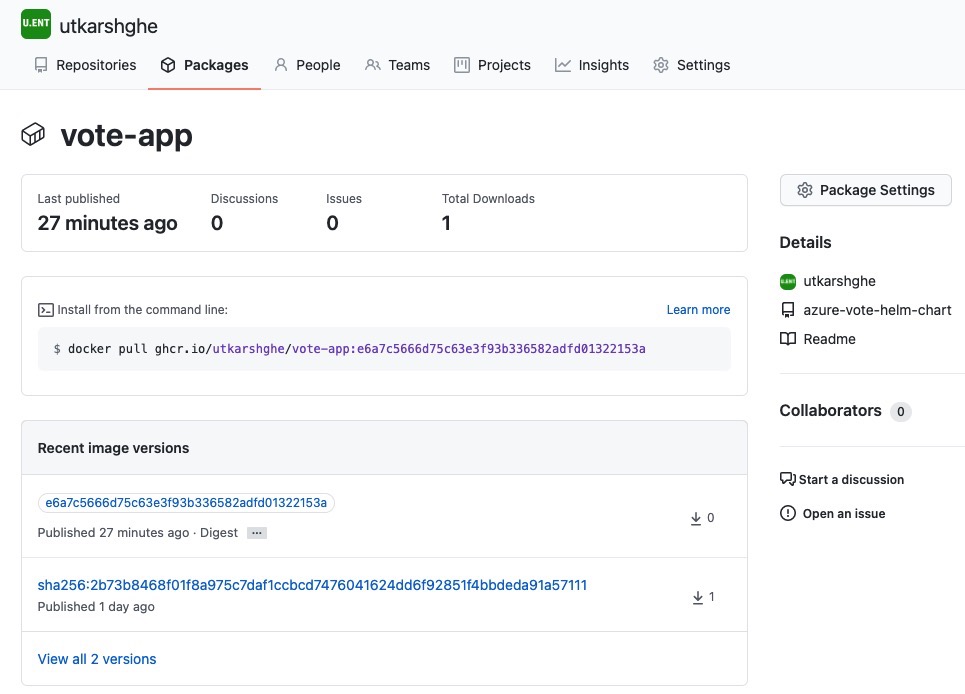
GCR_IMAGE: ghcr.io/${{ github.repository_owner }}/vote-app
First variable enables the OCI support for the Helm commands we are going to run later in the YAML.
Next variable HELM_VERSION_TO_INSTALL is used later in the workflow to install specific version of the Helm. For this workflow, we need 3.5.0.
Last variable GCR_IMAGE is constructing the chart name for the publication.
The GitHub Container Registry hosts containers at
ghcr.io/OWNER/IMAGE-NAME. I get theOWNERof the repository usinggithub.repository_ownerfromgithubcontext.
Next steps are defining the job with steps to download the code (where we have Helm chart) and install the specific Helm tool on the runner/agent.
jobs:
  build:
    name: publish gcr
    runs-on: ubuntu-latest
    environment: prod
    steps:
      - uses: actions/checkout@v2
        name: checkout repo

      - name: install helm
        uses: Azure/setup-helm@v1
        with:
          # Version of helm
          version: ${{ env.HELM_VERSION_TO_INSTALL }} # default is latest
The above steps setup the agent machine with the required Helm tool.
Next, we need to run few helm commands to login to GCR (GitHub Container Registry) and finally publish the chart.
-
We login to GCR using
${{ secrets.GITHUB_TOKEN }}GitHub Container Registry only recently started supporting
GITHUB_TOKEN. Previously you had to create a separate PAT token with specific permissions to GCR. -
Next two steps in the workflow will be to save the chart and publish. We do that using
helm chart saveandhelp chart pushcommands as shown below.
- name: login to acr using helm
  run: |
    echo ${{ secrets.GITHUB_TOKEN }} | helm registry login ${{ env.GCR_IMAGE }} --username ${{ github.repository_owner }} --password-stdin

- name: save helm chart to local registry
  run: |
    helm chart save ${{ github.workspace }}/src/azure-vote-helm-chart/ ${{ env.GCR_IMAGE }}:${{ github.sha }}

- name: publish chart to acr
  run: |
    helm chart push ${{ env.GCR_IMAGE }}:${{ github.sha }}
That is it, if all worked successfully for you, you should see the chart in the GCR.