Using Azure Shell with VSTS Git Repositories and VS Code
Aug 7, 2018 | Tarun Arora
| 2 min read
Azure
VSTS
PowerShell
Tarun Arora
| 2 min read
Azure
VSTS
PowerShell
If you are using Azure Shell, you’ll be pleased to know that it is now possible to use VSTS based git repositories right from within the Azure shell. In this short post I’ll run through cloning a VSTS git repository with in the Azure Shell, modifying one of the scripts and pushing the updates back to the server…
I work in a locked down enterprise setup… As a DevOps engineer I find it really frustrating when access to useful Azure PowerShell modules is blocked by the web proxy and firewall. Luckily Microsoft has delivered a PowerShell experience in the browser that takes away the pain people like me running behind the enterprise proxy and firewall ran into before. What blew my mind today was being able to interact with git repositories in VSTS right from within the azure shell. Steps on how to do this are outlined below…
Using Azure Files to store your data in Azure Shell
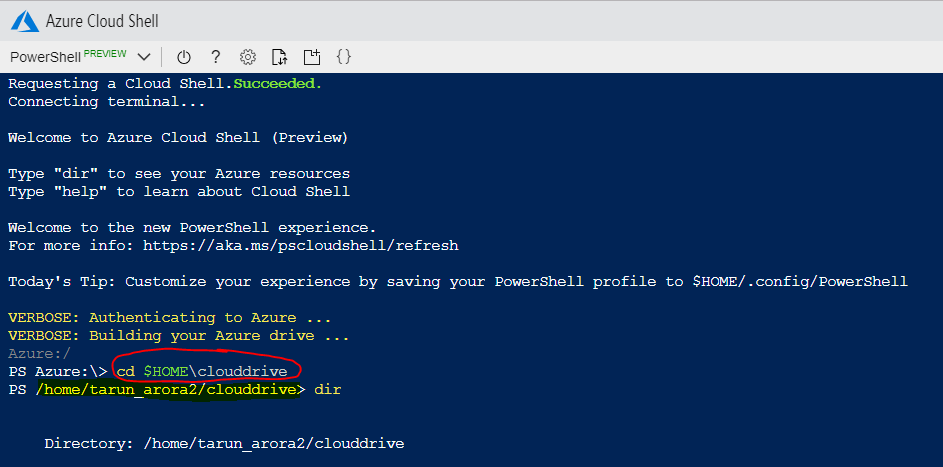
Open up the Azure PoweShell in a by browser by navigating to https://shell.azure.com/PowerShell. Run the command below to navigate into the Azure file store to store your data…
cd $HOME\clouddrive
Cloning VSTS Git repository in Cloud Shell
Now that I am connected to my cloud drive in Azure shell, i can create directories and files as I like. Run the below command to clone your existing VSTS git repository into Azure Shell… You’ll be prompted for username, just press enter without entering any value. When prompted for password enter your PAT.
git clone https://accountName.visualstudio.com/EnvHub/_git/Infrastructure
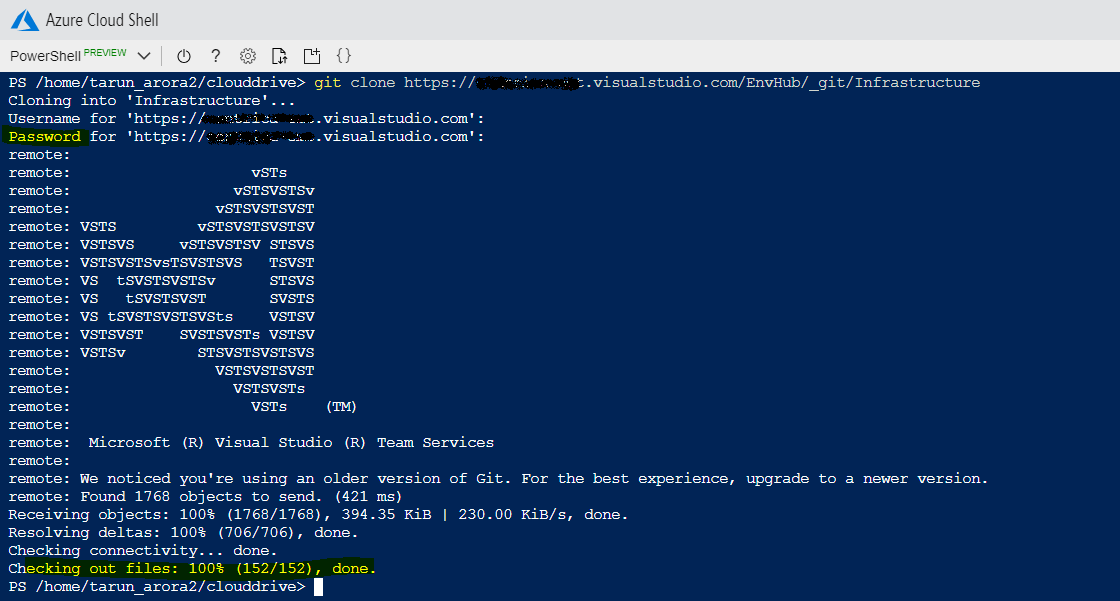
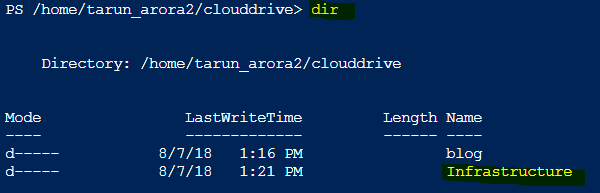
Next you can see the contents of the repository by navigating using standard commands…
Use Visual Studio Code to interact with your VSTS git repo in Azure Shell
This bit actually blew me away! Change directory into your git repository… Once you are in the git repository use the command below to launch the visual studio code editor in the context of your git repository…
PS /home/tarun_arora2/clouddrive> cd infrastructure
PS /home/tarun_arora2/clouddrive/infrastructure> code
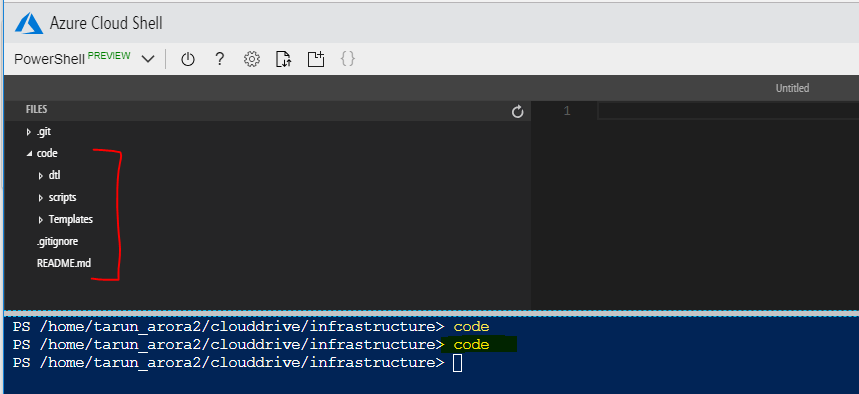
W00t! You can now navigate around in the editor that’s loaded your git repository right within the Azure shell.
Create new file in VSTS git repo from Azure Shell
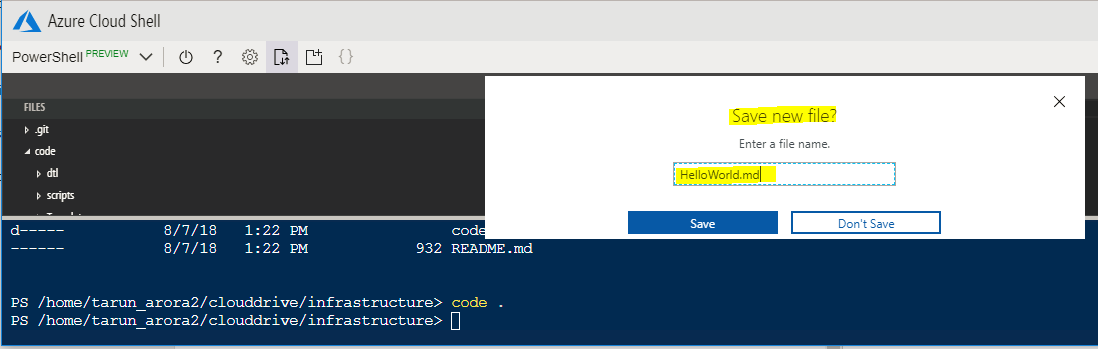
Next start editing the new file created by running the previous command, alternatively run the command code . to create a new empty file.
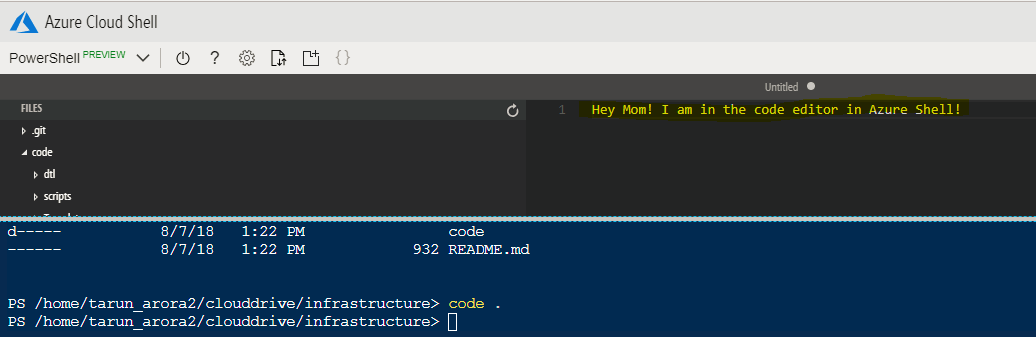
In the editor add some text into the file and click Ctrl + S and enter a file name to save the changes in a new file…
Committing changes into VSTS git repo from Azure shell
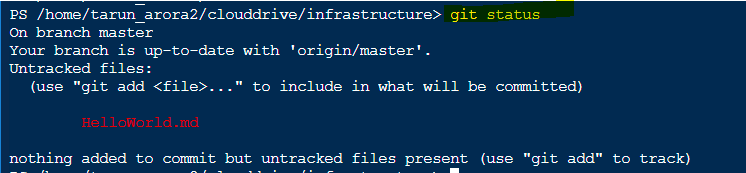
With the new file created, follow the usual git flow to stage the changes and commit into the git repository. Following on from there push the changes into remote…
` git status`
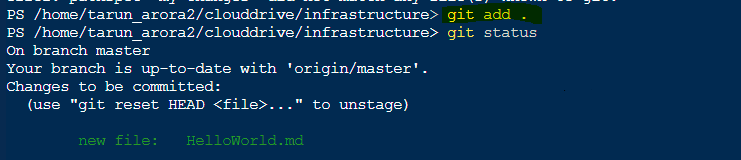
` git add .`
git commit -m "My changes"

git push -u
When pushing the changes to remote, you’ll need to configure your git username and password in global config if you haven’t done so already. You’ll also need to key in your PAT.
You can persist the PAT in your cloudstorage in the VS cloud shell
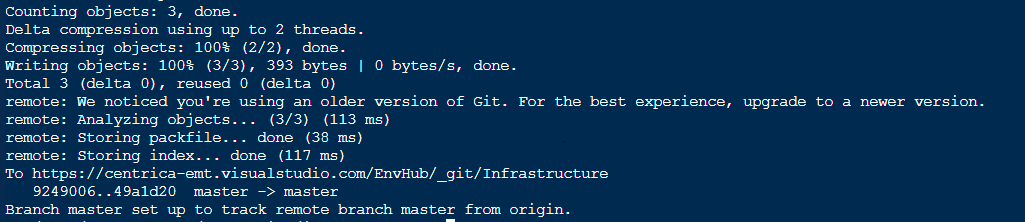
Magic! You’ve just commit changes into your repository from the cloud shell… Checking back the history of the repository in VSTS, you will see this commit…

The use cases this opens up are really limitless. Hope you found this useful!
Tarun