Back to basics: Building .NET Core app in VSTS
Jul 9, 2018 | Utkarsh Shigihalli
| 2 min read
DevOps
Build
Utkarsh Shigihalli
| 2 min read
DevOps
Build
My current client, just started to use .NET core as their main development platform. I felt this is the right time to revisit the build steps and document them. So in this blog post we will see how easy it us to build and publish a .NET Core app within VSTS.
For sample, we have two .NET core web applications, one hosting an Angular application and another hosting an Identity Server.
- First step we restore all the
npmpackages required for Angular application. For this we addnpmtask from the tasks library and run the commandinstall
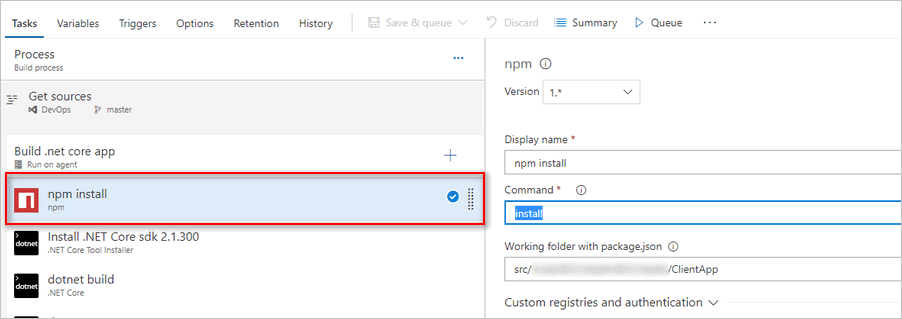
We set the working folder because our
package.jsonis nested in a folder within the repository.
- Our application is based on .NET Core SDK 2.1.300 and because we are running this build on a self hosted agent, we want to make sure the agent has .NET core 2.1.300 SDK is installed. To do that, we add
.NET Core Tool Installertask to our build definition and install the required SDK.
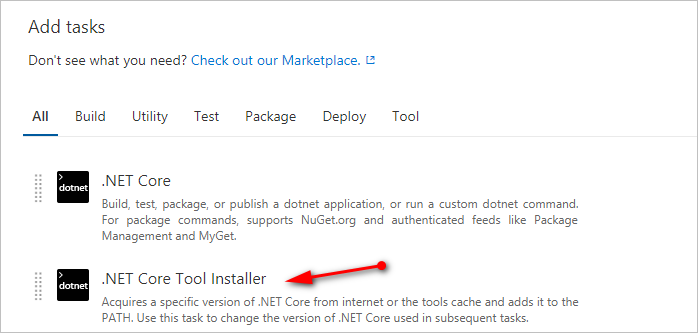
- We need to tell this task the version of .NET Core SDK we need. We do that by specifying the correct version number in the version field.
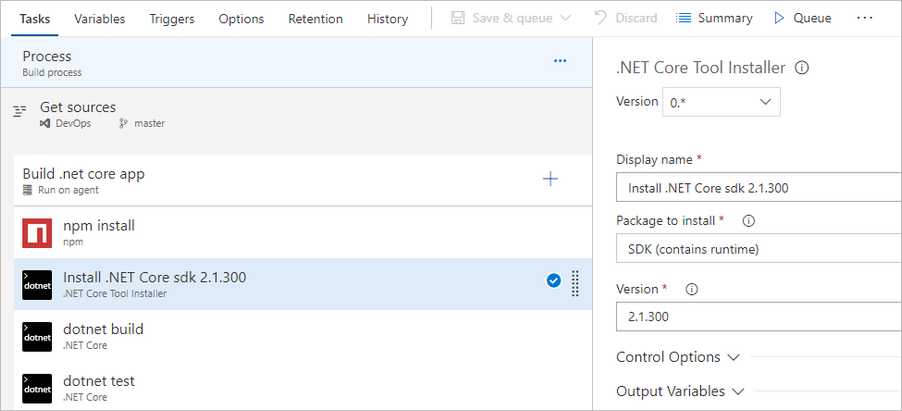
Please see the version number of SDK (or runtime) should exactly match as in the document here
- Next we need to build the application. We add a .NET core task and select
buildoption from thecommanddropdown. We are looking for all*.csprojfiles.
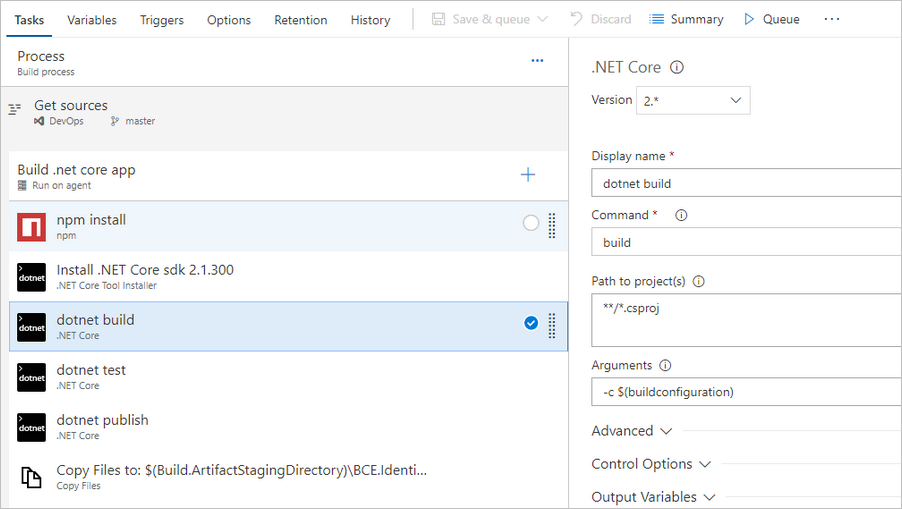
Note that, starting .NET Core 2.0, the application dependencies are automatically restored by commands
dotnet buildanddotnet publish. You no longer required to rundotnet restorecommand.
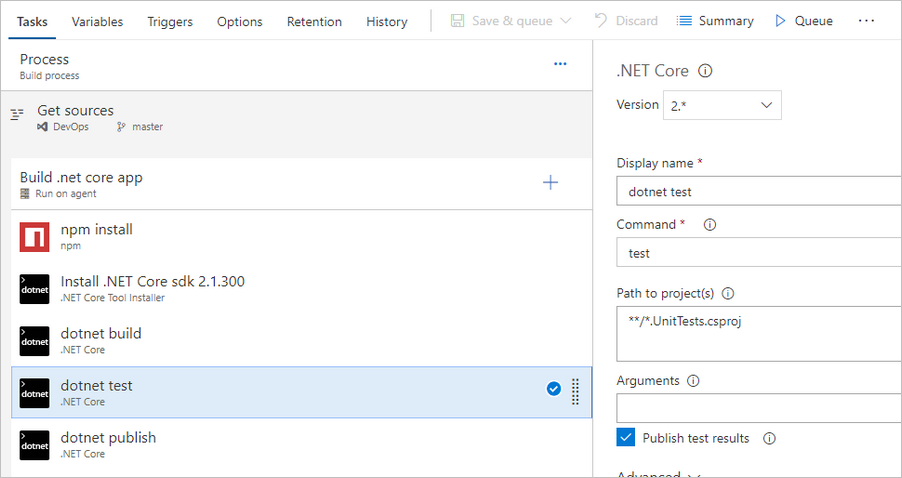
- Next we need to execute our unit tests. To do that we again add
dotnet coretask and this time selecttestcommand. We are scanning tests in*.UnitTests.csprojprojects. Make sure you checkPublish tet resultscheckbox so that test results can be published to VSTS. This task executes the tests and publishes the test results to agent’s temp directory
- Next we find the published test results file
(*.trx)file to VSTS. We use thePublish taskand change the Search folder to$(Agent.TempDirectory)
dotnet test task currently has results directory hardcoded to agent’s temp directory, which can be accessed using $(Agent.TempDirectory)
- Next, we will publish the artifacts to VSTS. We add one more .NET Core task and select
publishfrom the dropdown.
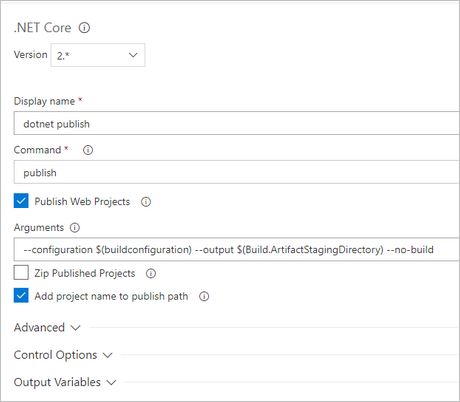
We specify additional arguments like --configuration and set output directory as $(Build.ArtifactStagingDirectory) using--output argument. Notice, we also check `Add project name to publish path to publish artifacts in to their individual directories.
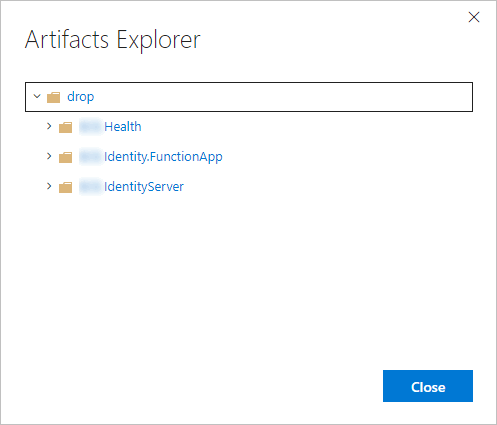
- Finally, we add
Publish Build Artifacttask to publish all the contents from$(Build.ArtifactStagingDirectory)to VSTS.
Let’s queue a build and you should see all the artifacts published in nice structure within drop directory.
This was a small post to get you started with .NET core build pipeline in VSTS. Hope you found this post useful.