How to move custom images (vhd) between Azure DevTest Labs
May 10, 2016 | Tarun Arora
| 2 min read
DevOps
Azure
AzureDevTestLabs
Tarun Arora
| 2 min read
DevOps
Azure
AzureDevTestLabs
Like me if you are using multiple Dev Test Labs in Azure for multiple teams, you would like to share custom images created by one group to the other if it helps them accelerate. After all sharing is caring :) In this blog post we’ll learn how to move custom images aka VHD’s between Azure Dev Test Labs. It would be great if you could leave a comment if you know a better way of achieving this… I would also be interested to know what other assets are you sharing between Azure Dev Test labs…
You might find this interesting… Deploying a new VM in an existing Azure DevTest Lab using VSTS
Scenario
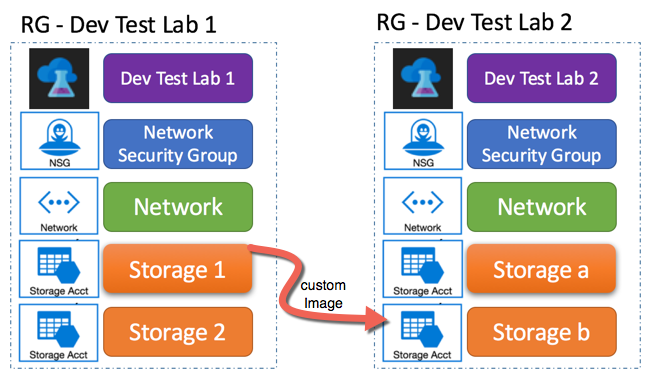
The Azure Dev Test Labs reside in a resource group that contains the lab itself, network, optionally a network security group and two storage accounts.
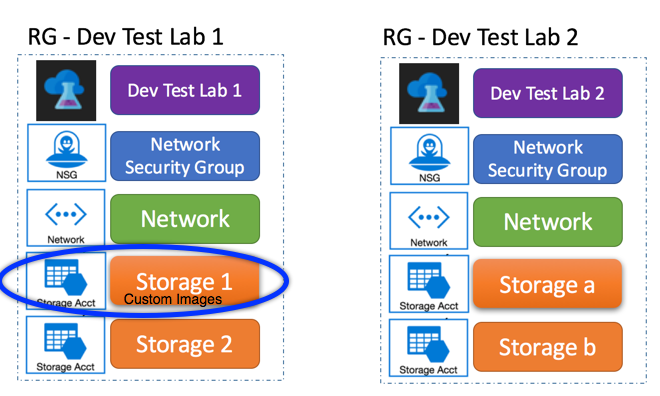
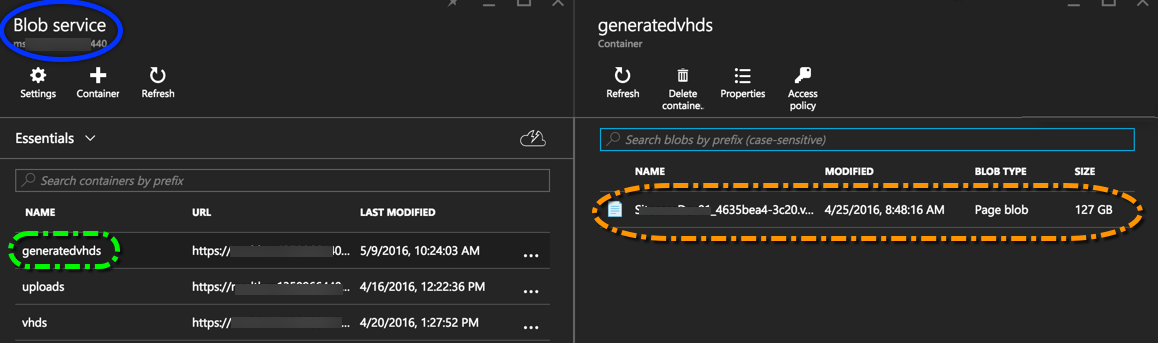
One of these two storage accounts is used to store the custom images generated in the dev test lab. If we navigate into the storage account and select blob storage, we’ll be able to locate a container that’s storing the generated vhds. This blob container stores the custom images generated in the dev test lab.
The caveat here is that it is not always the first storage account in the resource group that contains the generated vhd container, it could be in the other storage acconts in the resource group.
How to identify the container the custom image needs to be copied into?
The easiest way to identify which conatiner the custom image needs to go into is by clicking the add custom image option from the dev test lab settings blade. As demonstrated in the image below, the powershell is generated for you, simply reference the name of the storage account from here.
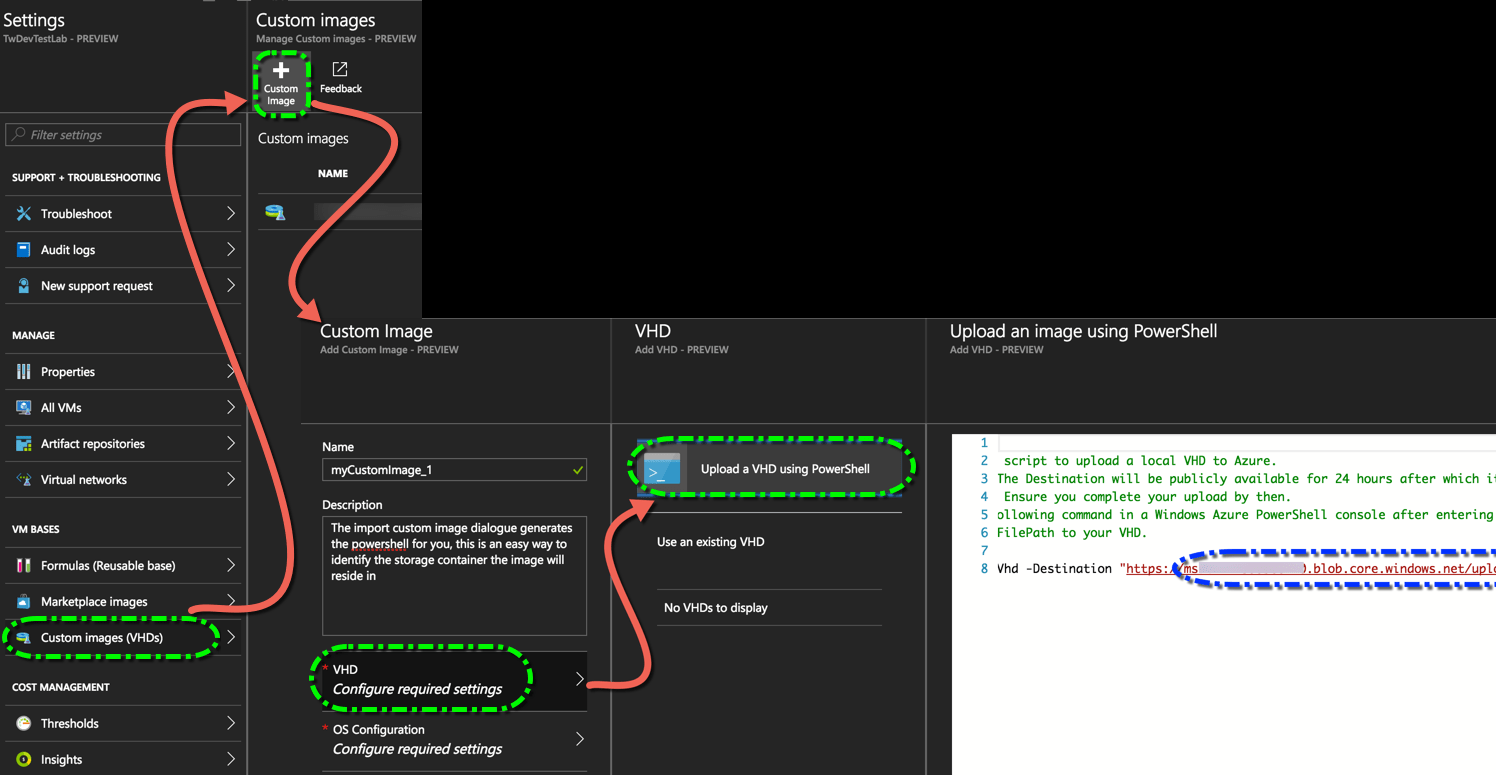
The storage account listed in the auto generated powershell in the add custom image window is the one your custom images need to go into.
Copying Custom Images between Azure DevTest Labs
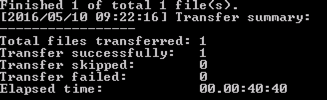
Now that we have successfully identfied the storage account and container that has the custom images, we can use the AzCopy command to copy the custom images between the blobs in the storage accounts without having to download the custom image locally first. More details on the AzCopy command can be found in the Azure MSDN Reference
The AzCopy command has the following syntax for copying a blob between two storage accounts…
AzCopy /Source:https://sourceaccount.blob.core.windows.net/mycontainer1
       /Dest:https://destaccount.blob.core.windows.net/mycontainer2
       /SourceKey:key1
       /DestKey:key2
       /Pattern:abc.txt
In our scenario source is storage account 1 destination is storage account b. The secure key’s for these can be found in the Access Keys window accessible from the storage account settings blade.
Open a command window and navigate to the AzCopy installation directory on your computer - where the AzCopy.exe executable is located. If desired, you can add the AzCopy installation location to your system path. By default, AzCopy is installed to %ProgramFiles(x86)%\Microsoft SDKs\Azure\AzCopy (64-bit Windows) or %ProgramFiles%\Microsoft SDKs\Azure\AzCopy (32-bit Windows).

The copy operation took 40 minutes for 127 GB worth of data.
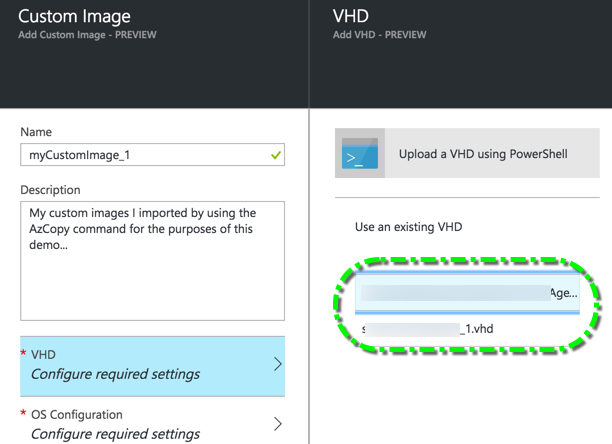
Navigate into the dev test lab 2 and click on add custom images, you’ll see the MyCustomImage.vhd show up under the section add existing images. Voila!
Recommended Reading…
- Why care about DevOps?
- What is Technical Debt & why is it a problem?
- How to install SonarQube as a Windows Service with SQL (Windows Auth) for code analysis with VSTS
Hope you found this useful…
Tarun