Using VSTS Release Management for Continuous Deployments to AzureDevTestLabs
May 26, 2016 | Tarun Arora
| 7 min read
DevOps
Azure
AzureDevTestLabs
TeamBuild
Tarun Arora
| 7 min read
DevOps
Azure
AzureDevTestLabs
TeamBuild
Provisioning infrastructure in your release pipeline gurantees a well known dependancy state of your software. In an average IT department software is developed by one team, infrastructure is provisioned by the other and software deployments are carried out by another. These silos often make releasing software such a misery. In this blogpost we’ll learn how to bring these three distinct activities into one single release pipeline to make releases as smooth as a riding a gravy train. It’s so easy, you’d want to do it for every application…
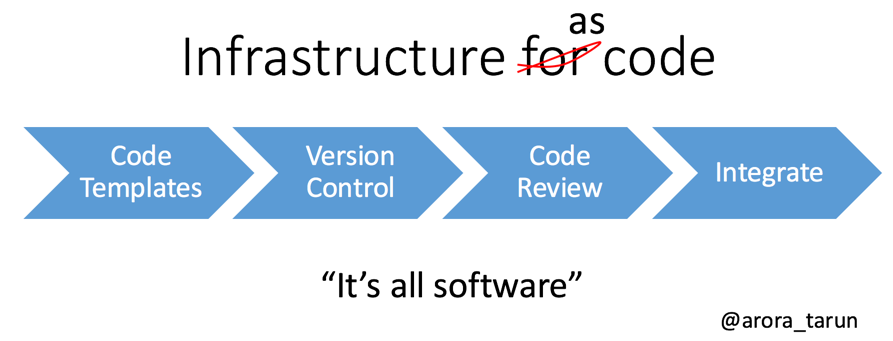
“Programmable Infrastructure” and “Infrastructure as code”… In this blogpost we’ll bring this concept to life…
Our Release Pipeline
In this scenario we’ll look at constructing a release pipeline for a web application by provisioning a DevTestLab virtual machine in Azure using AzureDevTestLabs, we’ll then run a DSC script to bring the virtual machine to the desired state of a web server. We’ll then deploy the web application on the newly provisioned web server. Then deploy a test agent to run Selenium based functional tests. Once the application has been successfully functionally tested, execute performance tests. At this point, take a snap shot of the virtual machine into a custom image in the AzureDevTestLab and then finally delete the virtual machine.
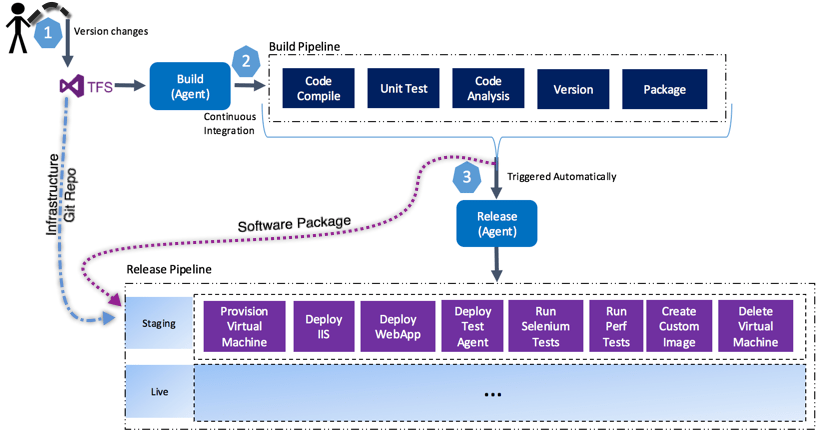
This will translate into the following release pipeline in Visual Studio Team Services…
Understanding the Release Processes
Let’s step through and understand the tasks one by one…
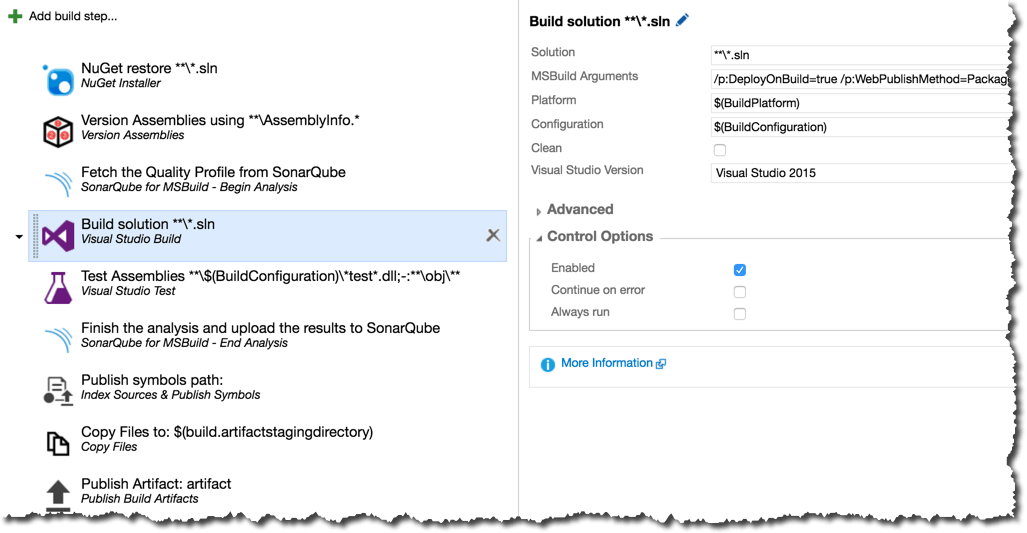
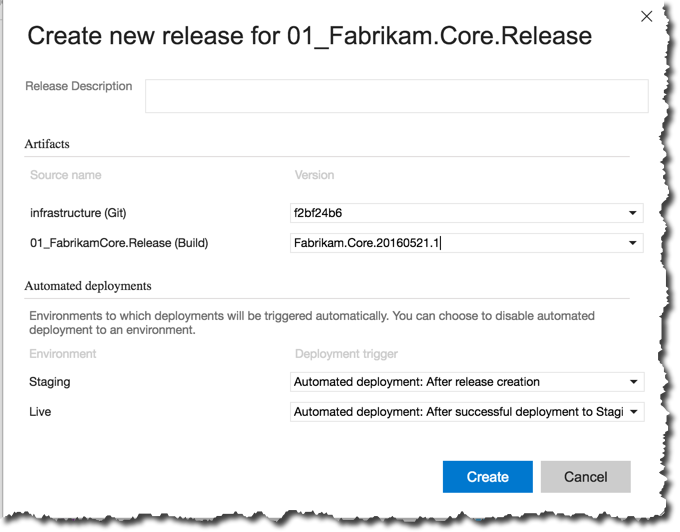
Software Artifact
A build definition Fabrikam.Core.Release is used to compile code, run unit tests, run sonarQube code analysis and then finally package the web application using Web Deploy. The build uses a custom task to version the binaries to the version of the build definition. The build on successful completion triggers the release definition Fabrikam.Core.Release
You can refer to the following two blogposts on SonarQube to learn more about,
- How to install SonarQube as a WindowsSevice with SQL Server using Windows Authentication for VSTS
- SonarQube Analysis in Continuous Integration using Team Build in VSTS
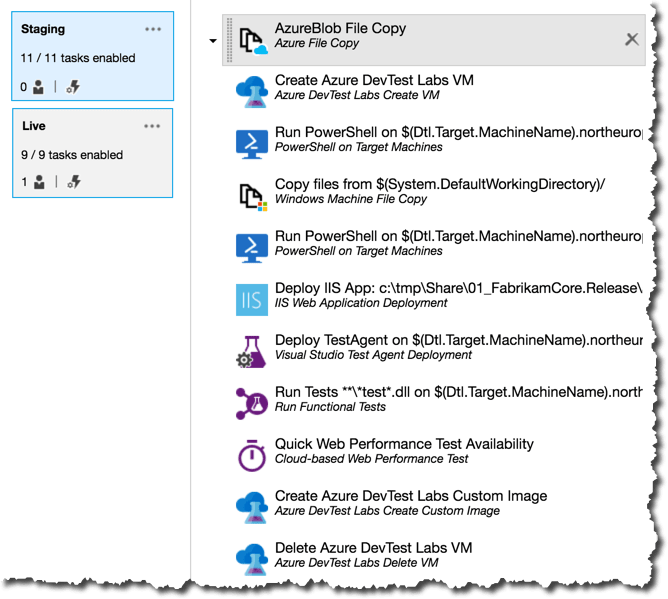
Release Tasks
Now that we have an artifact ready to be deployed, let’s step through the release process in detail.
-
Copying files into AzureBlog: Since virtual machines in AzureDevTestLabs share the storage of the lab rather than having a storage device per virtual machine, the
AzureBlob File Copytask does not allow you to copy files into the virtual machine. In this demo, I am using a basic Windows Server 2012 R2 image from the Azure Gallery, this image is not set up with any exceptions. There is no easy way to copy files into the virtual machine. I am going to open an SMB network share on the virtual machine to simply file copy operation on to this virtual machine. However, instead of pre-configuring the SMB I am going to configure the SMB as part of the build process. I am using the AzureBlob File Copy task to copy a PowerShell script from the source control into a container in the DevTestLab storage that I’ll later execute using VSTS to provision a SMB fileshare on the virtual machine.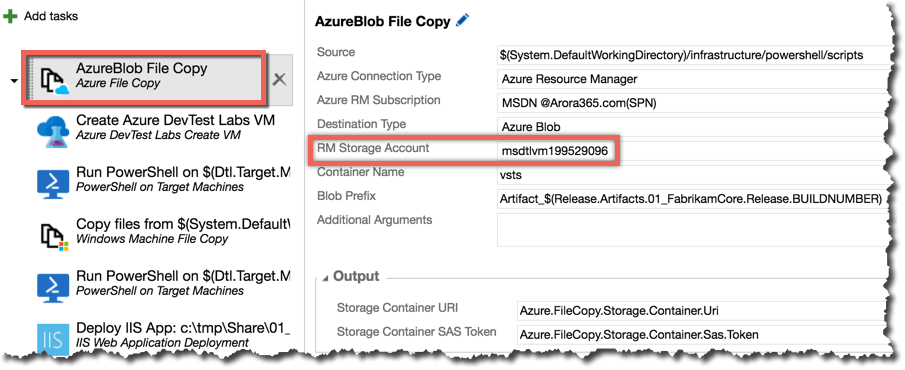
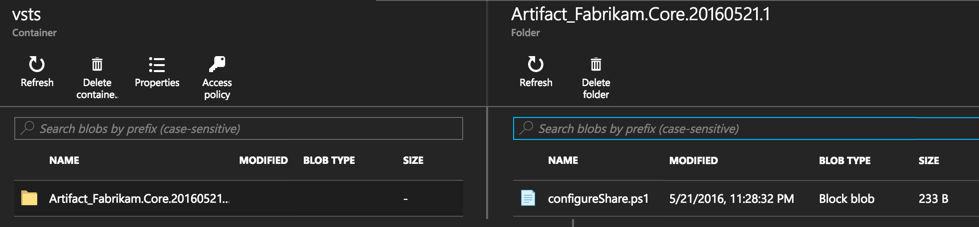
As you can see in the task configuration, I am using the build number to prefix the folder in the blob storage with the version of the build containg the script.
-
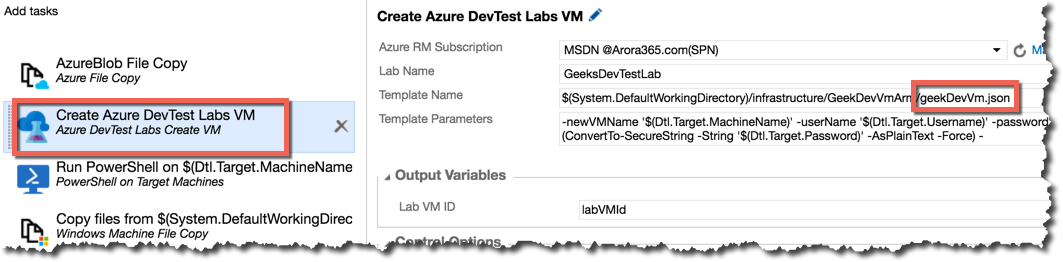
Create AzureDevTestLab VM: Create AzureDevTest Lab virtual machine is available as a task in VSTS. This can be downloaded from the Visual Studio Marketplace. You’ll need to configure an SPN to use Azure Resource Manager from VSTS, the task expected an ARM template to be passed as an input parameter. Refer to my blogpost on How to Deploy a new VM to an existing AzureDevTestLab from VSTS for more details on how to provision the virtual machine. While you can use a custom image, in this blogpost I’ll using a vaniella Windows Server 2012 R2 Image. As part of the machine creation process I am going to run two artifacts
- Download file from URI: You can read more about the download file from URI artifact here. The purpose of this artifact is to download the powershell script from the blob storage into the virtual machine.
- Configure WinRM for Https: I’ve written a seperate blogpost on how to use a custom script artifact to configure WinRM using ARM template Configure WinRM with ARM template in AzureDevTestLab VM deployment using PowerShell artifact. The purpose of this artifact is to configure WinRM for HTTPS access so the VSTS hosted agent can orchestrate remote powershell tasks on this virtual machine.
I’ve taken the standard ARM template and modified it to include the parameters for the two additional artifacts. In the parameters section of the ARM template add the following additional parameters…
  /* WinRM Custom Script Parameters */
    "Run_PowerShell.scriptFileUris": {
      "type": "string",
      "defaultValue": "[[\"https://raw.githubusercontent.com/
                                  Azure/azure-quickstart-templates/master/
                                  201-vm-winrm-windows/ConfigureWinRM.ps1\",
                          \"https://raw.githubusercontent.com/
                                  Azure/azure-quickstart-templates/master/
                                  201-vm-winrm-windows/makecert.exe\",
                          \"https://raw.githubusercontent.com/
                                  Azure/azure-quickstart-templates/
                                  master/201-vm-winrm-windows/winrmconf.cmd\"]"
    },
    "Run_PowerShell.scriptToRun": {
      "type": "string",
      "defaultValue": "ConfigureWinRM.ps1"
    },
    /* Download file from URI  */
    "Download_File_from_URI_URI": {
        "type": "string"
     },
     "Download_File_from_URI_FileDestination": {
       "type": "string"
     }
In the artifact section of the ARM template include the following two artifact calls…
  "artifacts": [
          {
            "artifactId": "[resourceId('Microsoft.DevTestLab
                                    /labs/artifactSources/artifacts',
                                    parameters('labName'), 'Public Repo',
                                    'windows-run-powershell')]",
            "parameters": [
              {
                "name": "scriptFileUris",
                "value": "[parameters('Run_PowerShell.scriptFileUris')]"
              },
              {
                "name": "scriptToRun",
                "value": "[parameters('Run_PowerShell.scriptToRun')]"
              },
              {
                "name": "scriptArguments",
                "value": "[variables('hostDNSNameScriptArgument')]"
              }
            ]
          },
          /* Download file to Virtual Machin */
          {
            "artifactId": "[resourceId('Microsoft.DevTestLab
                                    /labs/artifactSources/artifacts',
                                    parameters('labName'), 'Public Repo',
                                    'windows-download-sas-blob')]",
            "parameters": [
              {
                "name": "URI",
                "value": "[parameters('Download_File_from_URI_URI')]"
              },
              {
                "name": "FileDestination",
                "value": "[parameters('Download_File_from_URI_FileDestination')]"
              }
            ]
          }
-
Configure SMB NetworkShare on AzureDevTestLab VM: As part of the VM provisioing process the artifact WinRM Https configuration set up the virtual machine for WinRM access over HTTPS. In addition to this the other artifact copied the configureSMB.ps1 script from the blobstore into the virtual machine. Now I am going to use a remote powershell execution task to trigger the execution of this PowerShell script in the AzureDevTestLab VM.
The PowerShell script simply creates a folder called Share under C:\tmp and then opens this Share up for SMB access, this task also enables access on the pre-configured firewall rule for
File and Printer accesson this machine.
    # Configure SMB Share and Set permissions
    New-Item -ItemType Directory -Force -Path "C:\tmp\Share"
    if(!(Get-SMBShare -Name "Share" -ea 0)){
          New-SMBShare -Name "Share" -Path "C:\tmp\Share" -Description "A Share"
    }
    Get-SmbShareAccess -Name "Share" | Grant-SmbShareAccess -AccountName Everyone -AccessRight Full -Force
-
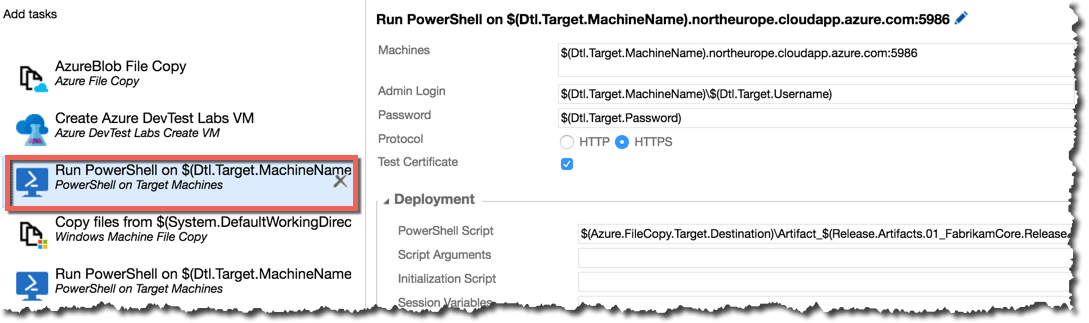
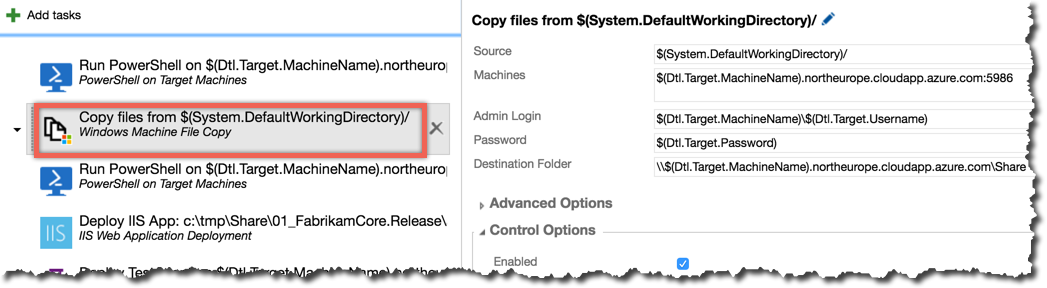
Windows Machine File Copy: Now that the SMB network share is configured. I am going to use the Windows Machine File Copy to copy scripts onto the newly provisioned virtual machine. In this case I’m going to copy the entire working directory of the release agent. This will copy all release artifacts associated to the release definition. In this case I’m going to copy a DSC script will ensure that the newly provisioned image has IIS and .NET 4.5 configured.
-
Trigger DSC Script to provision IIS & .NET 4.5: Now that the DSC script has successfully been copied on the newly provisioned AzureDevTestLab VM. I’ll use the
PowerShell remote executiontask to trigger the DSC Script.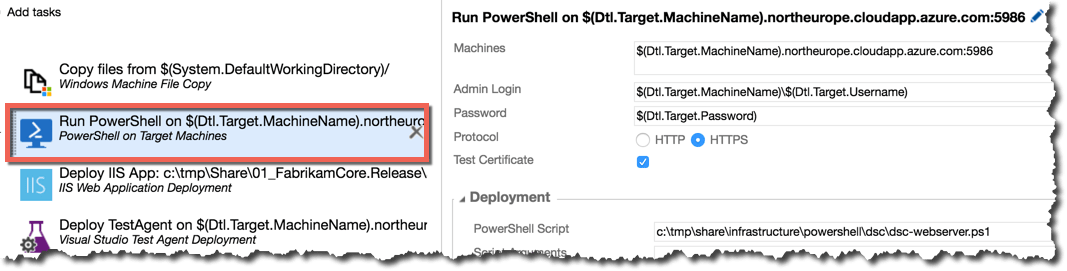
The DSC script is trivial, it calls for a desired state of IIS and ASP.NET on the target server…
    Configuration iis {

        Import-DscResource -ModuleName PSDesiredStateConfiguration;

        Node "localhost"{

            #Install IIS
            WindowsFeature IIS {
                Ensure = "Present"
                Name = "Web-Server"
            }

            #Install ASP.NET 4.5s
            WindowsFeature ASP {
                Ensure = "Present"
                Name = "Web-Asp-Net45"
            }
        }
    }

    iis

    Start-DscConfiguration -Path .\iis -Wait -Verbose
-
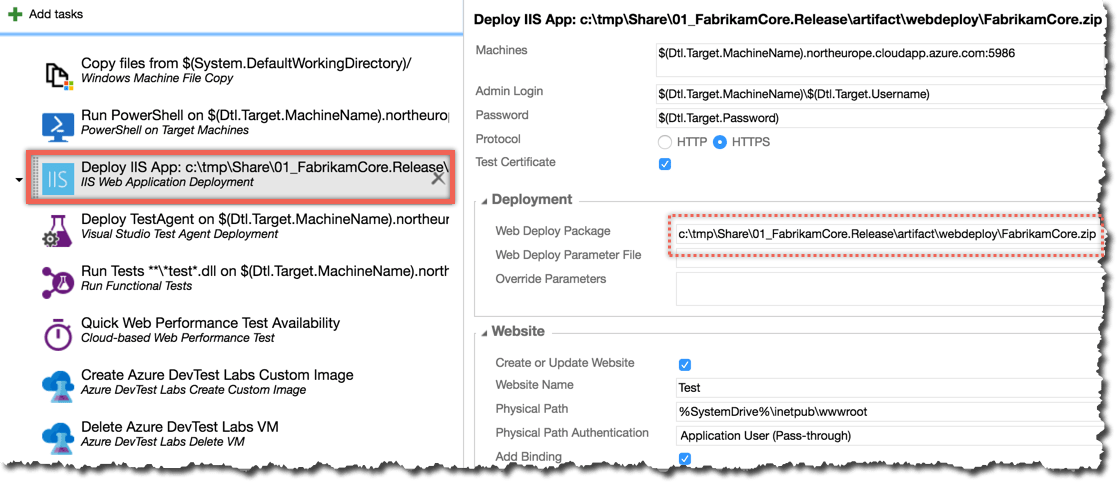
IIS Web App Deployment using WinRM: The IIS Web App Deployment task is available from the Visual Studio Marketplace. This task allows you to specify the locaton of the Web Deploy package, configure IIS by specifying the website and application pool configuration.
-
Deploy Test Agent: The test agent deployment task allows the installation of test agent on the target machine. This Test Agent can then be used to enable data collection or run Distributed Tests using the
Visual Studio Test using Test Agenttask.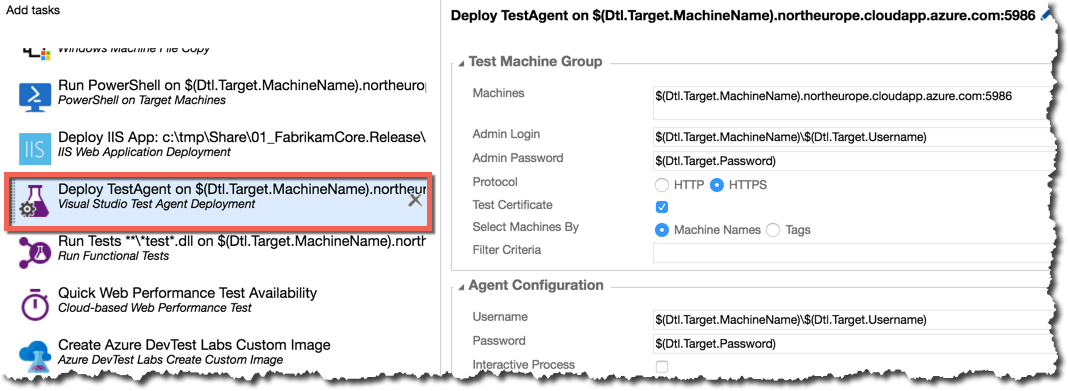
-
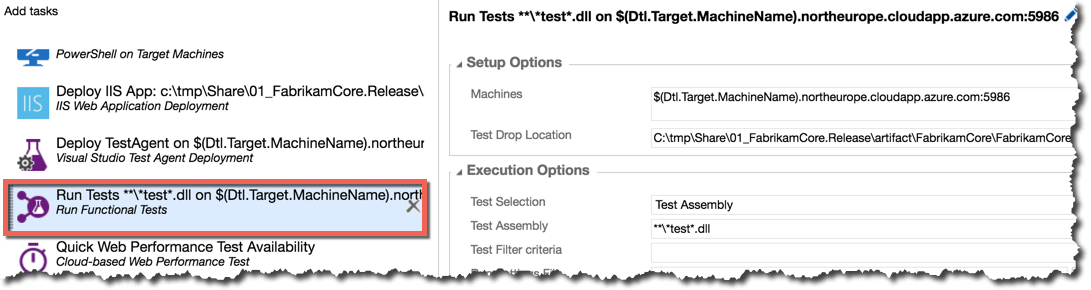
Run Functional Tests: I’ve some selenium based functional tests that I would like to run after the deployment. Now that the Test Agent has been installed, I can use the collector capabilties of the test agent to collect information about the test execution including code coverage. The tests are being passed to the release definition from the build definition through artifacts.
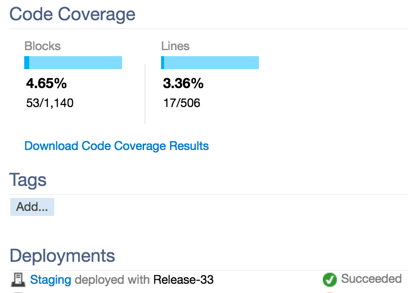
The benefit of this handover between build and release is that the test coverage is made available in the build as well. You can see the test coverage starts to show up in the build summary as the tests have been executed using the test runner.
-
Quick Web Performance Test: It would be good to run ping tests against the web application to validate the end points in the target application. In order to do this, i am using the Quick Web Performance Availability Tests Task.
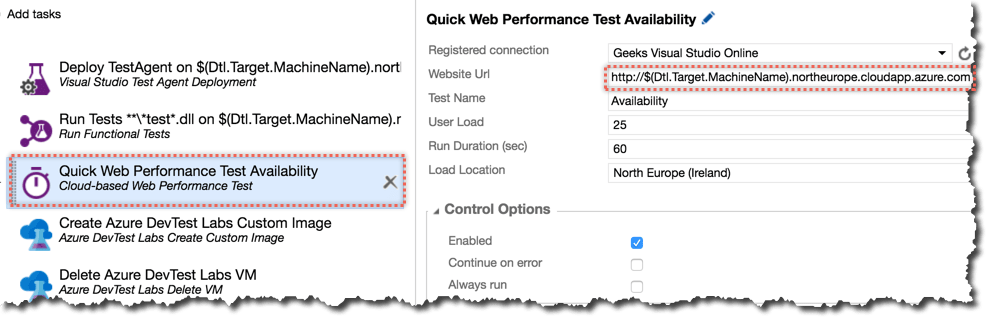
The service end point in this case needs to be the Visual Studio Team Services account you would like to use to run the availabilit tests. The service endpoint needs to be configured in the services tab in the administrator portal, more instructions on how to define service endpoint in VSTS
-
Capture Custom Image: Now that the software has been deployed and tested, it is worth capturing the state of the virtual machine as a custom image. This is specifically useful if you identify a bug in the process and want to reproduce the bug on the same virtual machine, having the virtual machine as a custom image will help you in potentially reproducing the bug quicker.
If you set the Windows OS State to SysPre Requested, then the user profile & settings will be removed from the virtual machine. This option is best suited if you want to create a resuable VHD for purposes of distribution. If you want to revisit the VM point in time, set the Windows OS State as
Non Sysprepped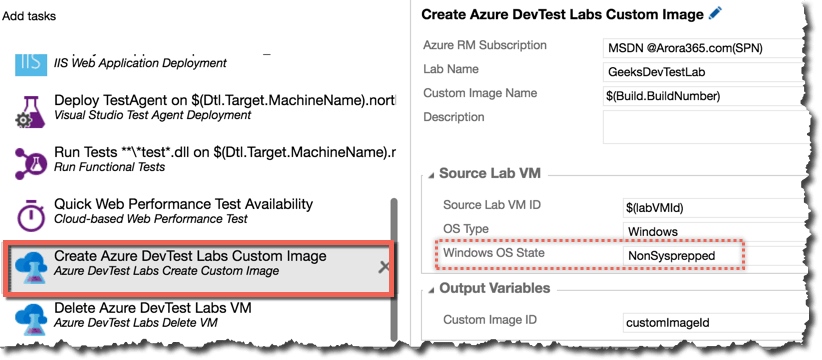
-
Delete AzureDevTest Labs VM: With the infrastructure deployed from scratch, the software deployed & tested and the state of the virtual environment captured as a custom image it seems sensible to delete the virtual machine. The AzureDevTestLab extension provides a task to delete an existing DevTestLab VM. As you can see below, I am passing
$(labVMId)as the Lab VM Id to be deleted. This parameter is populated as part of the Create VM task, I am simply repurposing the same parameter to delete the virtual machine created earlier in the process.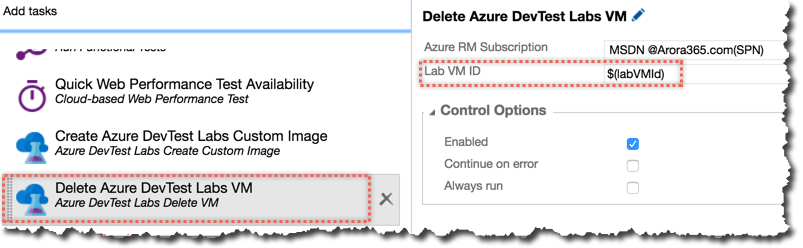
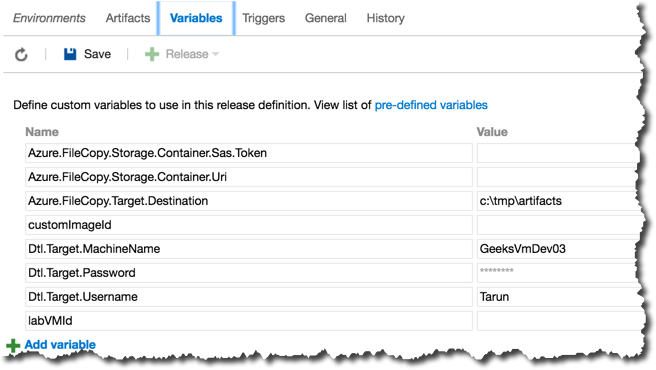
I would recommend using environment variables where possible instead of hardcoding the values directly in the tasks
As you can see in the screen shot below, I’ve created environment variables for most of the parameters being passed into the task configuration.
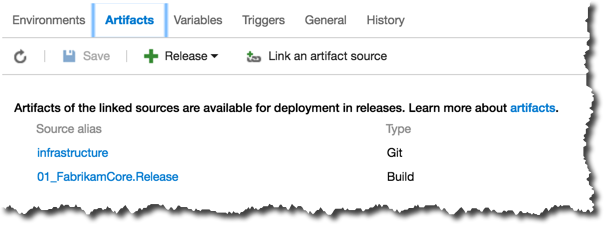
I am using the infrastructure repository as an artifact in addition to the mapping with the build definition. This is useful since infrastructure team can help enrich the infrastructure repository by creating the ARM template.
Testing the Release Pipeline
With the build and release process integrated and the release pipeline successfully configured. Queue a new build to trigger the release process or alternatively queue a release manually to reuse the last successful build to create a release in the staging environment.
Navigate to the logs tab to see the progress of the release in a real time…
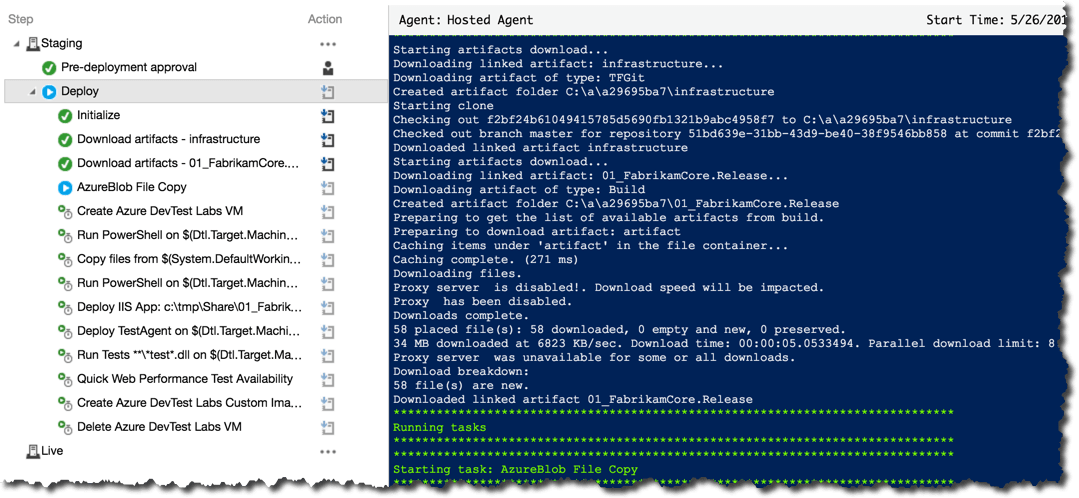
The release has successfully completed, the infrastructure was provisioned, software was deployed, tests were executed, custom image was taken and the virtual machine was deleted. The custom VM has successfully been created, this can be seen in the custom images blade in the AzureDevTestLabs. You can refer to the blogpost here on how to migrate custom images between AzureDevTestLabs
Summary
In this blogpost we saw how easy it is to bring environment provisioing into your release pipeline. With the introducing of Azure DevTestLabs and the complimentary VSTS extension it is easy as ever to deploy infrastructure as part of your release pipeline. Hope you found this blogpost useful.
Leave a comment if you would like me to share the underlying source, build and release definitions used in the blogpost.